How Long Does Septic System Installation Take?
Last updated: September 10, 2026
Key Takeaways
- Design and permit submission: often several days to 2 weeks , depending on who prepares the plans and how fast the health department reviews them.
- Excavation and tank setting: usually 1 day for a straightforward lot.
- Drainfield installation and backfill: usually 1 to 2 days .
- What site conditions would change the schedule by more than 1 week?
Table of Contents
- Who this applies to, and what I’m assuming you already know
- How long does septic system installation take?
- What affects the timeline the most?
- What actually happens during installation?
- How much does septic installation usually cost, and why does time affect price?
- When should the standard timeline not be trusted?
- What mistakes make septic installations take longer or fail?
- What should you ask before you hire someone?
A septic system installation usually takes 3 to 7 days once the crew starts work, but the full timeline is often 2 to 8 weeks when you include soil tests, permits, design review, excavation scheduling, and inspections. Good access, simple soils, and an available installer can keep things moving. Bad luck on any of those fronts can drag the job out; a mound system, deep excavation, rock blasting, or a slow permit office can stretch it much longer. EPA guidance and local health department rules are the best starting points for a realistic schedule.
Who this applies to, and what I’m assuming you already know
A homeowner or land buyer is the person this applies to — someone weighing a septic system on a property that is not connected to a municipal sewer line. I’m assuming you already know the basics: wastewater leaves the house, goes into a tank, and then moves into a drainfield or another approved soil treatment area; if any of that sounds fuzzy, consult a qualified septic professional and review local health department guidance. I’m not assuming you know the local rules, because that is where timelines change the most. For background, see the EPA septic systems overview.
I’m also assuming this is a standard residential job, not a commercial facility, mobile home park, or a property with unusual contamination. For a typical home, the process comes down to the ground under the lot, the permit office, and the equipment needed to move dirt. A conventional gravity system can be much faster than an engineered alternative such as a mound system or pressure-dosed system.
Shallow bedrock, a high water table, a steep slope, or a small lot changes the question fast. It stops being “how quickly can this be installed?” and becomes “which system can be approved here at all?” That is where a qualified septic designer, soil evaluator, or installer matters. Honestly, I would not call those sites a quick DIY project. The price of getting the layout wrong is not cosmetic; it can mean a failed inspection, a rework, or a system that never gets approved.
Ask one blunt question first: how long does permitting take in this county, and what kind of system are you likely to need on this lot? That answer usually tells you more than the installation crew’s truck count.
How long does septic system installation take?

For a standard residential septic system, the physical installation often takes 1 to 3 days of active construction time, while the total project commonly runs 2 to 8 weeks from first call to final approval. The spread depends on how much work happens before the excavator shows up. See also your local septic permit process and the EPA’s maintaining septic systems guidance for context.
The timeline usually breaks into pieces:
- Site evaluation and soil testing: often 1 day on-site, plus waiting for the report.
- Design and permit submission: often several days to 2 weeks, depending on who prepares the plans and how fast the health department reviews them.
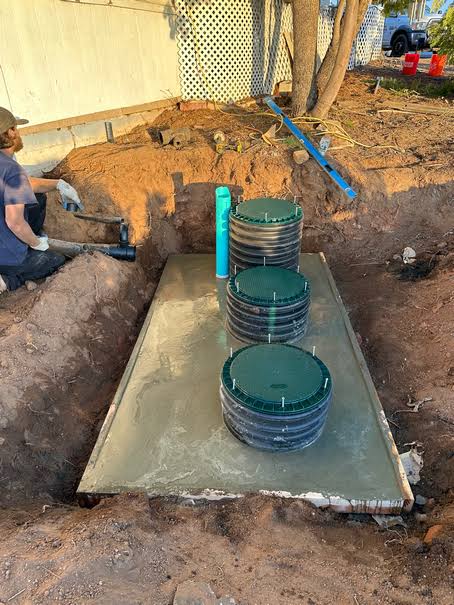
- Excavation and tank setting: usually 1 day for a straightforward lot.
- Drainfield installation and backfill: usually 1 to 2 days.
- Inspection and sign-off: can happen the same day as work, or it may add a few days if the inspector’s schedule is tight.
A simple gravity-fed system on level, well-drained ground can be the fastest option, but the exact pace depends on the permit process and site conditions. A pressure distribution system, mound, drip, or aerobic treatment unit can take longer because the layout is more technical and may need more inspection points; consult a professional if your site points that way. If the lot needs tree clearing, utility locates, or driveway removal to get equipment in, add time.
The biggest mistake I see people make is assuming the installation clock starts when they sign a contract. It usually starts when the site is ready, the permit is approved, and the materials are on hand. If a contractor says “three days,” ask what happens before those three days. That answer matters more than the number.
What affects the timeline the most?
Permits, soil, and access. That is the order that usually matters most. A willing crew can dig a hole fast; the tricky part is making sure the site qualifies and the work can pass inspection.
Soil is the main technical variable. Perc tests, soil evaluations, or other local absorption checks determine whether a conventional drainfield is allowed. If the soil drains well and the water table is low, the design is simpler. Clay, saturation, shallow restrictions, or rock change the game quickly and push the project toward more engineering and more material.
Access changes the schedule in a very practical way. A compact lot with a narrow driveway may need smaller machines, hand work, or staged deliveries. A lot with open space and easy truck access usually moves faster. If the tank and drainfield area are far from the street, or if there are fences, wells, septic setbacks, or buried utilities in the way, the install can slow down quickly.
Weather matters too. Heavy rain can turn an excavation into a trench full of water. Frozen ground slows digging. In northern climates, winter installations can still happen, but ground conditions and inspection timing can add days or weeks. In coastal or high-water-table areas, wet seasons can shut down a site until conditions improve.
Local regulation is the other big variable. Some counties require a soil report before design. Some want the tank set before a certain inspection. Some have stricter setbacks from wells, property lines, streams, or foundations. That is why a timeline from one town does not transfer neatly to another.
Want a realistic estimate? Ask for the schedule in four parts: soil testing, design and permit, field installation, and final inspection. A contractor who only gives you one number is usually hiding the slowest part.
What actually happens during installation?
The job follows a set order, and each step has a reason. One slip, and the rest tends to follow it.
- Confirm the site layout. Mark the house sewer line, proposed tank location, drainfield area, well setbacks, and property boundaries, usually with stakes or paint over a span of 50 to 150 feet. Verify that the layout matches the approved plan. A problem shows up when the tank conflicts with utilities, tree roots, or a setback line.
- Perform the soil evaluation or confirm the approved design. The soil report should identify texture, depth to restrictive layers, and seasonal groundwater limits. Verify that the proposed system type matches the soil conditions. A problem shows up if the design calls for a conventional trench field but the soil report points to shallow bedrock or a high water table.
- Pull the permit before digging. The permit package usually includes the design, site plan, and inspection requirements. Verify that the permit is active and posted if your jurisdiction requires that. A problem shows up if the crew starts excavation before approval, because that can force a stop-work order or a reinspection.
- Excavate the tank and field areas. Depth and slope matter here; the tank excavation must match the tank size and inlet/outlet elevations, often within inches, not feet. Verify that the hole is dry enough and level enough for the tank. A problem shows up if groundwater seeps into the excavation or the base is not properly graded.
- Set the tank and connect the inlet and outlet. Concrete, polyethylene, or fiberglass tanks must be placed on a stable base and connected with watertight joints. Verify that the tank is level and the risers are sealed. A problem shows up if the tank shifts, floats, cracks, or sits out of level.
- Install the drainfield, chambers, or distribution lines. Pipe slope is usually slight; gravity lines often need about 1/8 inch to 1/4 inch per foot, depending on the approved design. Verify that perforations, trench spacing, and aggregate depth match the plan. A problem shows up if the field is compacted by heavy equipment or if slopes are wrong.
- Backfill and protect the system. Cover the tank and field with the specified soil, then keep heavy traffic off the area. Verify that access lids remain reachable and that the ground is not crowned or sunk incorrectly. A problem shows up if the backfill is too wet, too tight, or too shallow over the components.
- Pass inspection and get the as-built record. The inspector may want exposed components before burial. Verify that the final layout matches the approved plan and that any changes are documented. A problem shows up if the crew moved the field, changed the tank size, or skipped a required inspection point.
A clean install is not just “the tank is in.” It is a system with the right elevations, the right soil area, and the right paper trail.
How much does septic installation usually cost, and why does time affect price?
A residential septic installation often costs several thousand dollars to well into five figures, and the project takes longer when the site is more expensive to build on. I am being intentionally broad here because local rules, soil, and system type change the number too much for fake precision to help anyone.
The price goes up when the work needs more engineering, more material, or more machine time. A conventional gravity system is usually the least complex. A mound system, pressure distribution system, or other engineered design usually costs more because it needs extra fill, pumps, electrical work, or tighter inspection. If you need blasting for rock, dewatering for wet soil, or imported fill, expect both the timeline and the bill to grow.
Time affects price in another way: equipment and labor are scheduled jobs. If a contractor has to hold a crew, reschedule inspections, or return after a permit delay, that can change the quote. A rushed job is not a bargain if it fails inspection and has to be reopened. The cheapest bid is often the one that has not included the difficult parts of your site.
If you are comparing bids, ask each contractor to spell out:
– tank type and size,
– drainfield type,
– permit and inspection responsibility,
– excavation and backfill,
– electrical work if a pump is involved,
– restoration of disturbed ground.
That list tells you whether two bids are actually for the same scope. A lower price with missing items is not a lower price; it is an incomplete quote.
When should the standard timeline not be trusted?
The standard timeline does not apply when the site needs engineering, the ground is unpredictable, or the permit office requires extra review. In those cases, the project can move from a few days of field work to a multi-week process. A qualified designer or installer should review those conditions before anyone assumes the schedule is fixed.
High groundwater or standing water in the excavation: This can flood the trench or tank hole and make the system fail inspection — stop and change the design, usually with dewatering, a raised system, or a different location.
Shallow bedrock within the required soil depth: The drainfield may not have enough treatment area — stop and ask for an alternative design such as a mound or engineered system.
Small lot with tight setbacks to a well, stream, or property line: The approved field area may be too limited for a conventional layout — stop and expect a custom design, which takes longer and usually costs more.
Frozen or saturated ground: Excavation quality drops and backfill compaction becomes unreliable — stop if the crew cannot keep the site stable, and reschedule rather than burying a poor installation.
Rock ledge or frequent large stones: Digging slows and elevations become hard to hold — stop and confirm whether blasting, hammering, or a redesign is needed.
Unknown underground utilities or old abandoned systems: The site can hide old tanks, lines, or electric service — stop and locate everything before digging deeper.
Those are not small delays. They change the job type. If a contractor keeps promising the same 3-day schedule after one of these problems appears, I would be skeptical.
What mistakes make septic installations take longer or fail?
Skipping or rushing the soil evaluation is the first mistake. It leads to the wrong system design, and the fix is a redesign plus another inspection cycle. The better move is to get the soil work done before you commit to a layout.
The second mistake is letting the crew dig before the permit is approved. That can trigger a stop-work order, force the excavation to sit open, and add days or weeks. Wait for the permit and know which inspection must happen before backfill.
The third mistake is assuming every lot can take a conventional gravity system. A lot with a high seasonal water table or shallow restrictive layer may need an engineered system. Guessing wrong can mean a failed inspection or a system that does not drain correctly. Ask what system type the soil report supports before you sign.
Poor access planning is the fourth mistake. If the excavator cannot reach the tank area or the delivery truck cannot get to the fill pile, the crew spends time reworking the site. That can mean higher labor costs and a longer install. Clear access lanes and confirm turning radius before the start date.
The fifth mistake is burying components too soon. If the inspector needs to see the tank, distribution box, or pipe grades and the crew covers them early, the work may have to be reopened. Confirm the inspection sequence in writing.
Ignoring restoration is the sixth mistake. A septic install often disturbs more ground than people expect. If topsoil, seed, or grading is not included, the yard may look unfinished for weeks. Ask what the final grade will be and who is responsible for restoration.
What should you ask before you hire someone?
Ask questions that expose the real schedule, not the hopeful one. Start with: What is the total timeline from soil test to final inspection in this county? That question forces the contractor to account for permit delays and weather, not just excavation.
Then ask:
– What system type do you expect on this lot: gravity, pressure, mound, or something else?
– Who handles the soil evaluation and the permit?
– What inspections must happen before backfill?
– What site conditions would change the schedule by more than 1 week?
– What is excluded from the price: electrical, pump work, tree removal, rock removal, or restoration?
If the answers are vague, the project probably is too. A good contractor should be able to explain the order of work in plain language and tell