What a Septic Site Evaluation Includes
Last updated: September 10, 2026
Key Takeaways
- A reader should also know that a “site evaluation” is not the same as a final septic design.
- The evaluation usually starts with paperwork.
- Soil testing is the heart of the evaluation.
- Depending on local rules, that can include hand-auger borings, test pits, or both.
A septic site evaluation asks a blunt question: can this parcel safely handle an onsite wastewater system, and where could the drainfield actually go? Soil, slope, groundwater, and setbacks all shape the answer. Buying land? Adding a house? Replacing a failed system? Then this septic site evaluation tells you whether the site can work before you sink money into excavation or design. Quick answer: fieldwork often takes 2 to 4 hours, and some counties also want a reserve area about the same size as the primary field. Check EPA guidance on onsite wastewater systems and your local health department before you assume a lot will pass. U.S. EPA septic systems and EPA septic basics explain the core process.
Who this applies to, and what you need before the evaluation starts

Anyone needing an onsite sewage system permit, a replacement drainfield, a repair after failure, or a pre-purchase buildability answer falls into this group. Wastewater leaves the house, hits the soil, and local health rules decide whether that treatment can happen on your lot. Simple enough. You do not need soil science, but you do need a property survey, a clear idea of proposed house size or bedroom count, and access to the parcel. Before anything else, check the county health department or a qualified professional.
Not every lot deserves a hopeful shrug and a tape measure. If the site sits in a mapped floodplain, has almost no usable area, or is already boxed in by wells, streams, wetlands, or steep slopes, the answer may be “not suitable” rather than “here is where to dig.” I would expect a qualified designer, soil scientist, sanitarian, or local health department to be involved early in those cases. Septic rules are local, so one county can read setbacks and repair options differently from the next county over. EPA septic siting considerations and local code are the sources to check.
A septic site evaluation is not the same as a final septic design. One asks whether the land can support a system; the other turns that answer into a trench, mound, chamber, drip, or pressure system sized for the proposed use. On a small or oddly shaped lot, that difference matters a lot — one layout might fit, while another is dead on arrival.
What a septic site evaluation includes
A septic site evaluation includes a review of the lot, a walkover of the land, soil testing, setback measurements, slope checks, and a written conclusion about whether a septic system can fit and function there. The exact form varies by county or state, but the core elements are the same: map the site, inspect the soil, look for water movement and limiting layers, and measure the separation distances that keep effluent away from wells, streams, property lines, and building foundations. For the exact local thresholds, consult the health department or an on-site wastewater professional.
Paperwork usually comes first. The inspector or designer reviews the parcel map, tax map, deed, plat, survey, and any prior soil logs or permits. I like that review because a lot can look roomy on aerial imagery and still be unusable once easements, buffer lines, or old drainfields are counted in. A good evaluator also checks the proposed structure: a 3-bedroom home, a 5-bedroom home, or a commercial kitchen can trigger very different flow assumptions. In many counties, a one-bedroom change can change the required design flow by a few hundred gallons per day.
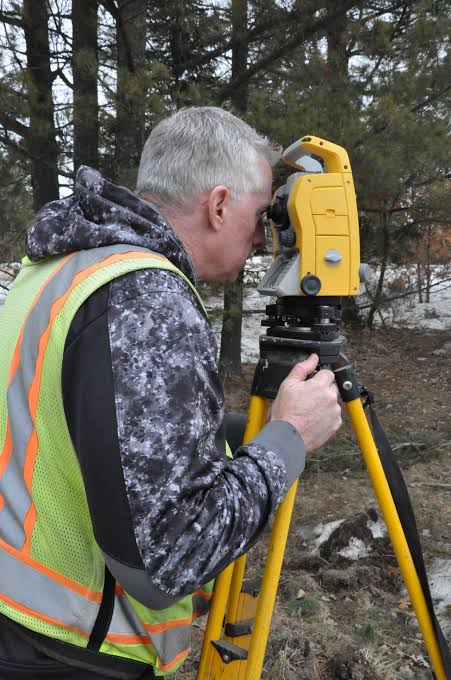
Then the field visit starts. The evaluator walks the site, flags the house location, probable septic tank location, and candidate drainfield area, and checks physical limits. They measure slope, identify obvious wet areas, note rock outcrop, tree cover, fill, and surface drainage patterns, and confirm whether there is enough area for the required reserve or replacement field. Many jurisdictions require a reserve area of similar size to the primary drainfield; if the lot cannot accommodate that, the permit may be denied or restricted. Want the local standard? Ask the county sanitarian before you finalize a site plan.
Soil testing sits at the center of the evaluation. Depending on local rules, that can include hand-auger borings, test pits, or both. A test pit is an excavated hole, often deep enough to read the soil profile directly. The evaluator looks for texture, structure, restrictive layers, depth to seasonal high groundwater, mottling, bedrock, hardpan, and other clues that tell how quickly water can move and how much treatment the soil can provide. If percolation testing is part of the local process, they may also run a perc test, which measures how fast water drains from a test hole. A perc rate alone is not the whole story; a lot can perc well and still fail because of shallow restrictive soil or a high water table. USDA soil description guidance and county rules are the best references for the profile terms.
A proper evaluation also records setbacks. Common constraints include distance from wells, property lines, streams, lakes, drainage swales, buildings, and utility lines. The actual numbers come from local code, not guesswork, and they matter because a site can be technically “good soil” and still fail on spacing. That is one place generic writeups go wrong: they obsess over soil and ignore the legal separation distances that can sink a permit. In some jurisdictions, setbacks are 25 feet from property lines and 50 to 100 feet from wells, but you should verify the local code.
The final output should be a report or form with the soil description, test results, field sketch or map, limiting conditions, and a clear recommendation. Good reports name what was found, not just whether the site “passed.” If a report does not say where groundwater, restrictive layers, and setbacks were observed, I would treat it as incomplete. Ask the evaluator to explain missing data before you rely on it.
How a septic site evaluation is done, step by step

A septic site evaluation is done by combining records review, field measurements, and soil observations in a fixed order so the final recommendation rests on measured limits rather than a guess. The sequence matters because each step narrows the usable area before the evaluator ever talks about a tank size or drainfield type. Order matters here. A lot.
- Confirm the proposed use. State the intended bedroom count, occupancy, or commercial use on the application; verify the design flow basis in the local code, often tied to bedrooms or fixture count; a problem is any mismatch between the house plan and the evaluation, because undersizing the system is a common permit failure.
- Pull the parcel documents. Gather the survey, plat, deed, and any prior septic records; verify lot lines, easements, and existing structures; a problem is missing or outdated mapping, which can hide setbacks or old drainfield footprints.
- Locate all fixed constraints in the field. Measure wells, streams, ditches, ponds, foundations, and property boundaries with a tape, GPS, or survey mark reference; verify the local setback distances, which can range widely by jurisdiction; a problem is any encroachment into a required buffer.
- Walk the proposed system area. Flag likely tank, distribution, and reserve-field zones on the ground; verify slope, drainage, and usable area; a problem is land that looks open but is actually too steep, too narrow, or cut by rock or fill.
- Excavate or auger soil holes. Open test pits or boreholes deep enough to read the soil profile, often 4 to 6 feet where allowed; verify texture, structure, color changes, and any mottling or seepage; a problem is refusal to depth, water entering the hole, or abrupt restrictive layers.
- Measure depth to limiting conditions. Record the distance from finished grade to seasonal high groundwater, bedrock, or hardpan; verify the minimum vertical separation required by local rule, which may be 12, 18, 24, or more inches depending on system type; a problem is shallow limiting soil that leaves no room for treatment.
- Run perc tests if required. Saturate the test hole per local protocol and time the water drop, often in minutes per inch; verify that the rate falls within the permitted range for the intended system; a problem is a rate that is too fast, too slow, or inconsistent between test points.
- Map the primary and reserve areas. Draw the approved field area and backup area on the plat or sketch; verify that both can fit without violating setbacks; a problem is a site that only works if the reserve area disappears, because many jurisdictions will not approve that.
- Issue the conclusion in writing. State suitable, conditionally suitable, or unsuitable, with the limiting factor named; verify that the report matches the field notes and local code; a problem is a vague approval with no soil data, which can cause design and permit trouble later.
If a reader can do any of this themselves, it is the document gathering and keeping the site clear for the evaluator. The soil judgment, setback interpretation, and final sign-off should be left to the licensed person or local authority the jurisdiction requires. For a permit, check the county health department before you schedule digging.
What do soil, groundwater, and slope actually tell the evaluator?
Soil, groundwater, and slope tell the evaluator whether the land can clean wastewater before it reaches wells, streams, or the surface. The answer comes from three things working together: how fast the soil accepts water, how much unsaturated soil is available for treatment, and whether the topography will send water where it should not go. EPA and USDA soil guidance both emphasize that soil profile and separation matter as much as drainage speed.
Soil texture is one clue. Sandy soil drains quickly; clay holds water; loam sits between them. But texture by itself is not enough. Structure matters too. A clay loam with blocky structure may accept wastewater differently from a dense, massive clay. That is why a field note that says only “sandy” or “good soil” is not useful. I want a profile description that names horizons and limiting layers. A better note is “sandy loam over dense clay at 24 inches.”
Groundwater is the other major factor. Evaluators look for seasonal high water table indicators such as gray soil matrix, mottling, seeps, or water in the hole. A site can be dry in August and still fail if spring groundwater rises into the treatment zone. The required vertical separation between the infiltrative surface and limiting layer is the guardrail here. Many codes use a measured separation in inches, not a visual estimate. In some places, 12 inches is the minimum; in others, it is 24 inches or more.
Slope changes everything fast. Gravity can move effluent, rainwater, and surface runoff in the same direction, and that can push a system into trouble. A steep site may require a mound, pressure distribution, or a different layout entirely. It also affects construction cost because grading, pump placement, and pipe runs get harder as slope increases. One common mistake is assuming a steep lot is automatically unsuitable. That is wrong. It may still be buildable, but the evaluation has to show where the system can sit without daylighting, surfacing, or eroding. A 15% slope can still be usable in some designs if local rules allow it.
The technical term to remember is “limiting condition.” That is the first soil or site feature that prevents the system from being installed as planned: water table, bedrock, hardpan, slope, or setback. Good evaluations identify the limiting condition early and state it plainly. Bad ones hide it in jargon.
When does a septic site evaluation stop being the right answer?
A septic site evaluation stops being enough when the site can only work with a special design, a variance, or a different disposal method. At that point, the next step is not another guess; it is a more qualified review or a different plan.
High groundwater within the required separation: this means the soil cannot provide the vertical treatment distance the code requires — move the system, raise it with an approved design, or expect the site to be rejected.
Bedrock or hardpan too close to the surface: this means there is not enough unsaturated soil below the infiltrative surface — a mound, at-grade, or alternative system may be needed, if the jurisdiction allows it.
Setbacks overlap wells, streams, or property lines: this means the usable field area is legally blocked — redesign the house location or accept that the lot may not support onsite disposal.
Very steep slopes or unstable fill: this means the ground may not hold a conventional trench system safely — slope correction or a different system type is needed, and some sites should simply be ruled out.
Signs of a failed or abandoned system nearby: this means the site may have contaminated soil, hidden piping, or an old drainfield footprint — the area should be investigated before any new installation.
No room for a reserve area: this means a permit may fail even if the primary field fits — rework the layout or find another parcel portion before going further.
This is where DIY usually hits a wall. A reader can measure, map, and collect documents. Once the issue becomes groundwater interpretation, code exceptions, or system type selection, I would bring in the evaluator or health department instead of trying to force a conventional answer onto a nonconventional site. For edge cases, consult a licensed designer and the local code before you spend money.
The mistakes that ruin a septic evaluation
A septic evaluation goes wrong when people treat it like a quick glance instead of a measured site test. The mistakes are predictable, and each one has a cost.
One error is evaluating only the “pretty” part of the yard. The consequence is that the chosen area fails a setback or sits on shallow restrictive soil. The right move is to test the most likely field area and at least one backup area before assuming the front or back yard will work.
Another is relying on a perc test alone. The consequence is false confidence on a site with shallow groundwater or bedrock. The correct alternative is a full soil profile or test pit where local code allows it, because drainage speed does not replace depth-to-limiting-layer checks.
A third mistake is ignoring the reserve area. The consequence is a permit that cannot close because the lot has no legal backup location. The right alternative is to lay out both the primary and reserve field during evaluation, not after.
A fourth is moving the house after the septic review without rechecking the plan. The consequence is a tank, driveway, or foundation that lands on top of the field or a setback line. The correct alternative is to lock the house footprint before final approval, or rerun the evaluation if the plan changes.
A fifth is assuming old lines or abandoned systems do not matter. The consequence is hitting buried pipes, crossing a failed field, or installing in contaminated soil. The proper move is to ask for prior permits and visually confirm old components before excavation starts.
A sixth is taking vague approval language at face value. The consequence is a design problem later, when the engineer or health department asks for the actual soil data. The right alternative is to insist on a report with measurements, limiting conditions, and a sketch that can be matched to the parcel. If the report is thin, ask for clarification before you sign.
How long it takes, and what a good result looks like
A septic site evaluation usually takes a field visit of a few hours, plus any lab, mapping, or permit review time required by the county. The on-site work is often 2 to 4 hours, but larger or difficult parcels can take half a day. A final written report may follow in 1 to 7 days, depending on local workload and whether the evaluator needs more soil data.
A good result is not just “approved.” It is a clear statement of suitable, conditionally suitable, or unsuitable, backed by soil descriptions, measured setbacks, and a field sketch. A useful report also states whether the lot supports a conventional trench, pressure, mound, or alternate system, and whether a reserve area is available. If you are comparing several parcels, use the same checklist on each one so the results are comparable. That makes the septic site evaluation easier to review and easier to defend if the county asks questions later.
If the report is conditional, read the conditions closely. Some approvals depend on a specific bedroom count, a house location, or a particular system type. A lot that is approved for 3 bedrooms may not be approved for 5. A lot that works with a mound may not work with a conventional gravity field. Those differences are why the septic site evaluation should be done before final site plans are locked in.
For more technical detail, see EPA and USDA soil resources, and ask the local health department for the code that applies to your parcel.